How tos
Table of contents
Service management
How to access the cloud server
Access to the cloud server is managed using the authentication method selected during server creation or reinstallation. The following authentication methods are available:
-
Key-based authentication with the cloud-user
-
Password authentication with the root user
Depending on the operating system, here are several methods for accessing a cloud server:
SSH
SSH (Secure Shell) provides secure, encrypted network communication and is primarily used to access Linux-based cloud servers. It can also be used with Windows servers that support OpenSSH.
To connect, you'll need the server's IP address and credentials (password or private key). To retrieve this information:
-
In the left-hand menu, navigate to Cloud Servers → Create & Manage and select the cloud server
-
On the server details page, scroll down to the Public IP row and use the displayed IP address to connect
-
Use the private part of the SSH key that matches the fingerprint shown in the SSH key field
For more details, see the article Connecting to a remote server via SSH.
RDP
RDP (Remote Desktop Protocol) provides a graphical interface for managing Windows-based cloud servers. You can connect using the built-in remote desktop client in Windows or third-party RDP clients on other platforms.
To set the administrator password, access the VNC console after creating the server. Once the password is set, you can connect to the cloud server via RDP.
For more details, see the article How to connect to a Windows server.
VNC console
The VNC console provides direct access to the current output of both Linux and Windows-based cloud servers through a graphical interface in a web browser. It is typically used for troubleshooting, server recovery, or resetting the root password (we do not store server passwords).
To access the VNC console, complete the following steps:
-
In the left-hand menu, navigate to Cloud Servers → Create & Manage and select the cloud server
-
Scroll down on the server details page and click VNC console
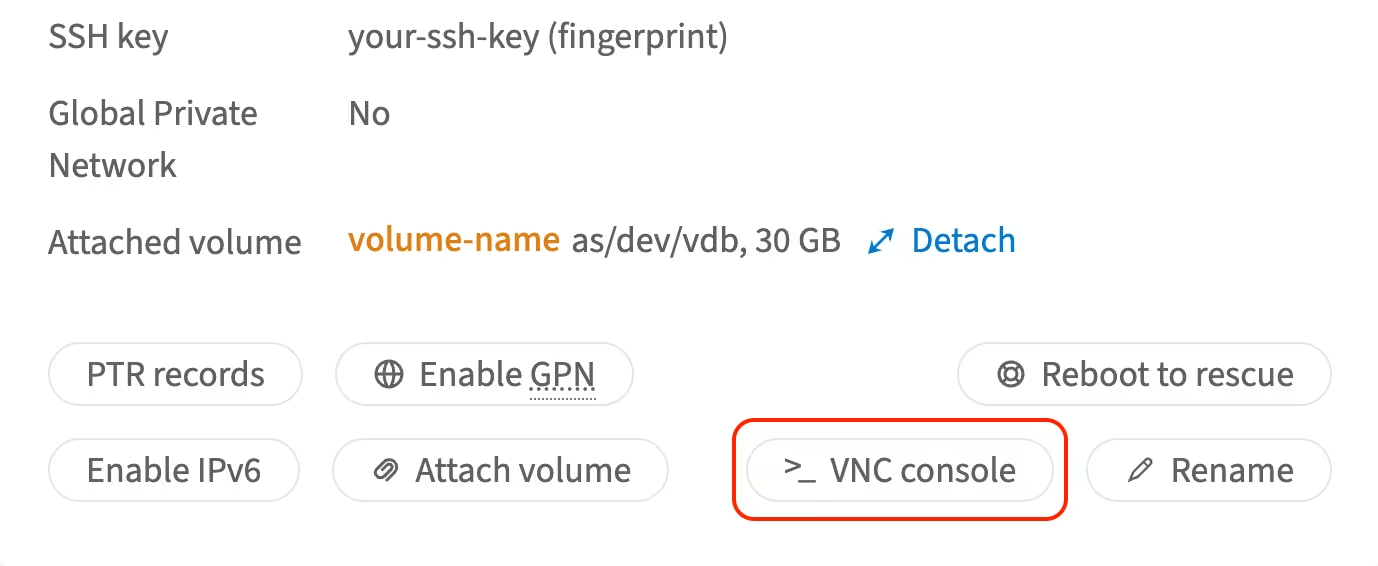
- Enter your account password or a one-time code if two-factor authentication (2FA) is enabled
The VNC console will open.
How to upgrade a cloud server
A cloud server can be upgraded to a more powerful plan.
To upgrade the cloud server configuration, complete the following steps:
-
Navigate to Cloud Servers → Create & Manage and select the server
-
On the server details page, go to the Upgrade tab
-
Choose a configuration from the available options and click Upgrade
-
Confirm the action by entering your account password
-
Wait for the upgrade to complete
The cloud server will be upgraded.
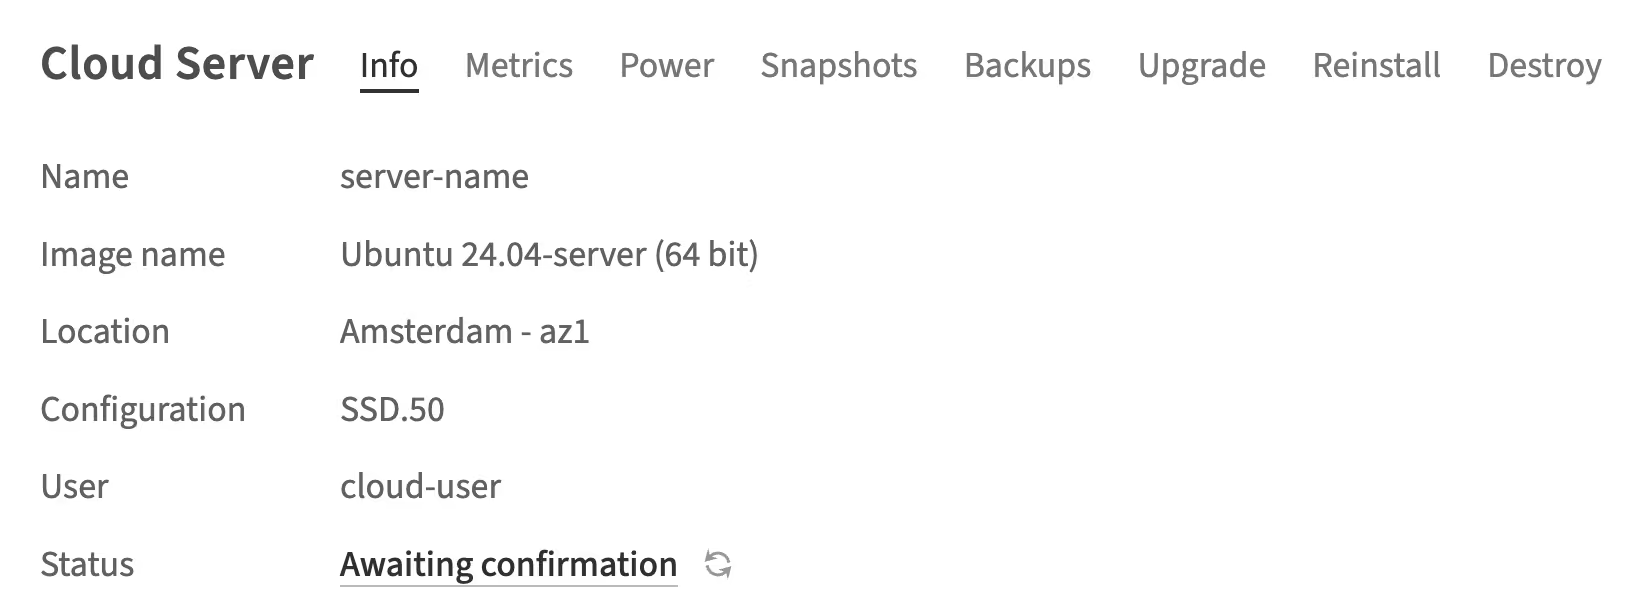
Upgrade confirmation
The server will be available for operations as soon as the upgrade is complete, regardless of whether you confirm the upgrade.
You have 72 hours to confirm or revert the upgrade after completion. If no action is taken within this period, the upgrade will be confirmed automatically.
Please note that if the upgrade is reverted, any data added to the server after the upgrade will be lost.
To confirm the server upgrade, complete the following steps:
-
On the server details page, click Awaiting confirmation
-
Click Confirm Upgrade
The upgrade will be confirmed.
How to delete a cloud server
Before deleting a cloud server, review the cancellation terms.
To delete a cloud server, complete the following steps:
-
In the left-hand menu, navigate to Cloud Servers → Create & Manage and select the server
-
On the server details page, go to the Destroy tab and click Destroy
-
In the confirmation window, click Destroy again and enter your account password
The cloud server will be deleted.
How to upload your own image
You can upload your own images for cloud servers within a cloud region, without any cost for storage.
There are two options for adding images to the system:
Option 1: Drag and drop
-
Log in to the customer portal
-
In the left-hand menu, navigate to Cloud Servers → Images and click Upload image
-
Choose the location where the cloud server is deployed for which this image is intended
-
In the area labeled Drop images here or click to upload:
-
Drag and drop the image file, or click inside the area to browse and select the file from your computer
-
Click Upload to begin
Option 2: Upload by cURL
-
Log in to the customer portal
-
In the left-hand menu, navigate to Cloud Servers → Images and click Upload by cURL
-
Go to the Upload by cURL tab
-
Select your cloud server location and provide:
-
A Name for the image
-
The Format of the image
-
Click Generate cURL Request
-
Copy the generated cURL command and execute it in your terminal
Your image will be uploaded and ready for OS installations within a cloud region.
How to view preliminary billing information
Cloud computing resources are listed on invoices in an aggregated (summarized) format for each cloud region. To view preliminary billing information (pro forma), complete the following steps:
-
Log in to the customer portal
-
In the left-hand menu, navigate to Reports → Cloud Servers
-
Select the period and cloud region for which you want to view the preliminary billing information
A billing summary will display all cloud computing resources used in the selected location, including the number of units consumed during the specified period.
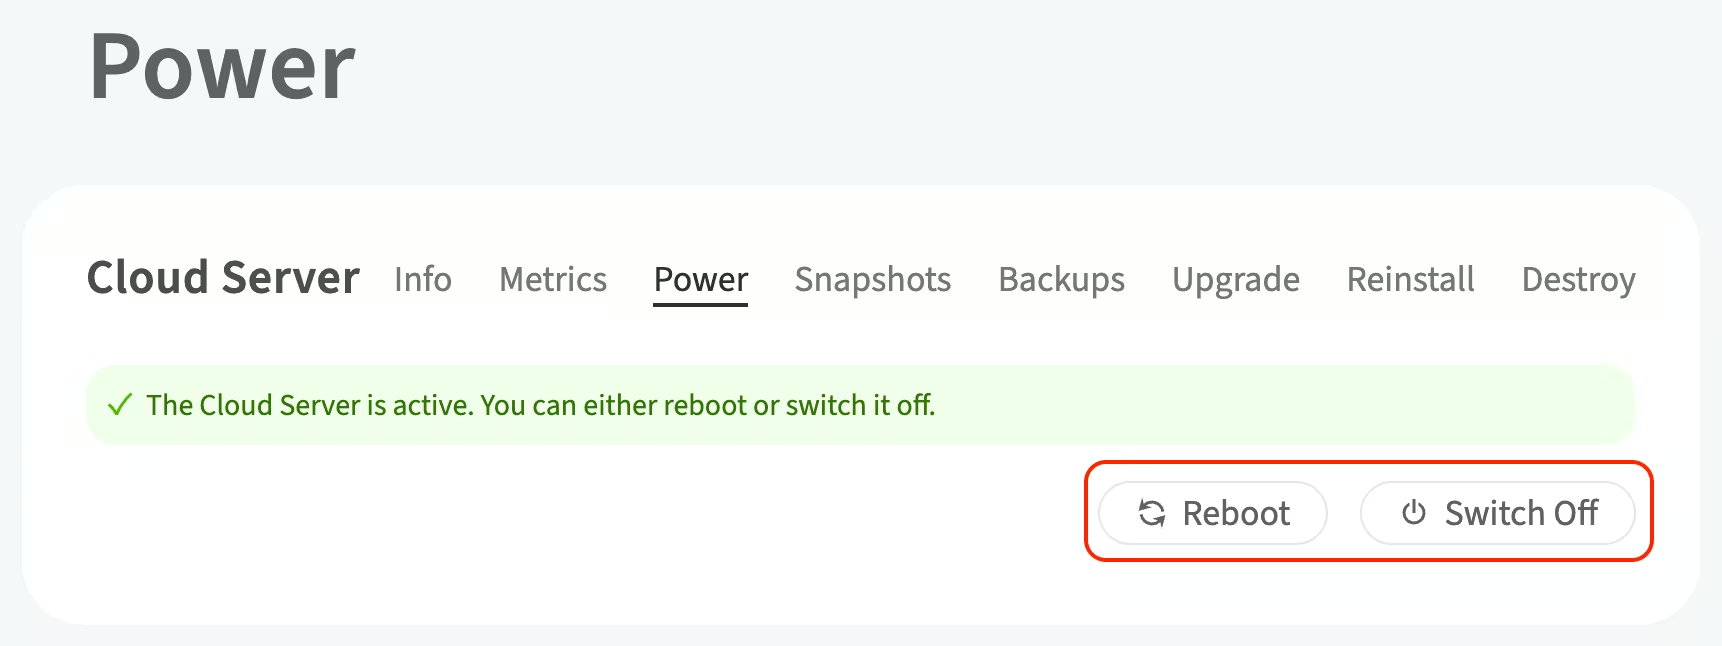
Power management
You can manage the power state of your active cloud server. To check its current status, navigate to the cloud server details page and scroll to the Status row.
To reboot or power off the server, complete the following steps:
-
In the left-hand menu, navigate to Cloud Servers → Create & Manage and select the server
-
On the server details page, go to the Power tab and click the appropriate button
-
Confirm the action by entering your account password
The power state of your active cloud server will be switched.
Snapshots and backups management
Snapshots and backups allow you to capture the current state of your cloud server and restore it later, providing a safeguard for your data. The total size of a snapshot depends on the used disk space on the cloud server.
You can manage your snapshots and backups in customer portal → Snapshots & Backups.
How to create a snapshot
-
In the left-hand menu, navigate to Cloud Servers → Create & Manage and select the cloud server
-
On the server details page, click Snapshots
-
Click Take Snapshot and enter a name for the snapshot
Once the status changes from Pending to Active, the snapshot will be created.
How to download or delete snapshots and backups
-
In the left-hand menu, navigate to Cloud Servers → Snapshots & Backups
-
In the item line, click Download or Delete
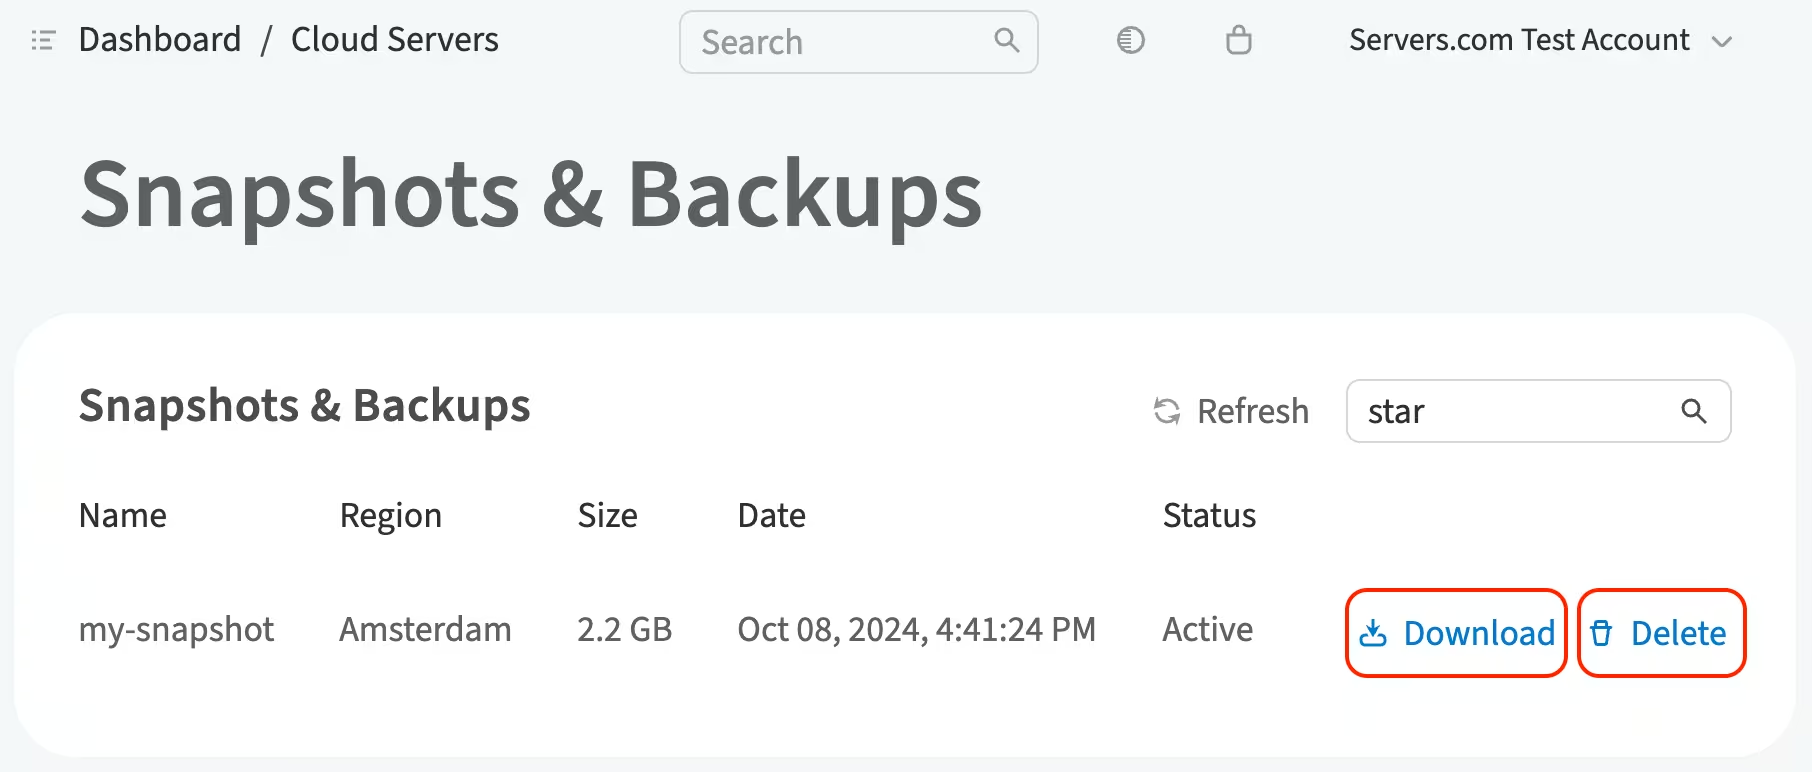
Depending on the selected action, the file will either be downloaded or deleted.
Downloaded snapshots and backups will be in `qcow2` format.
How to activate automatic backup creation
-
In the left-hand menu, navigate to Cloud Servers → Create & Manage and select the server
-
On the server details page, click Backups
-
Click Manage Backups
-
Select the number of copies and click Save
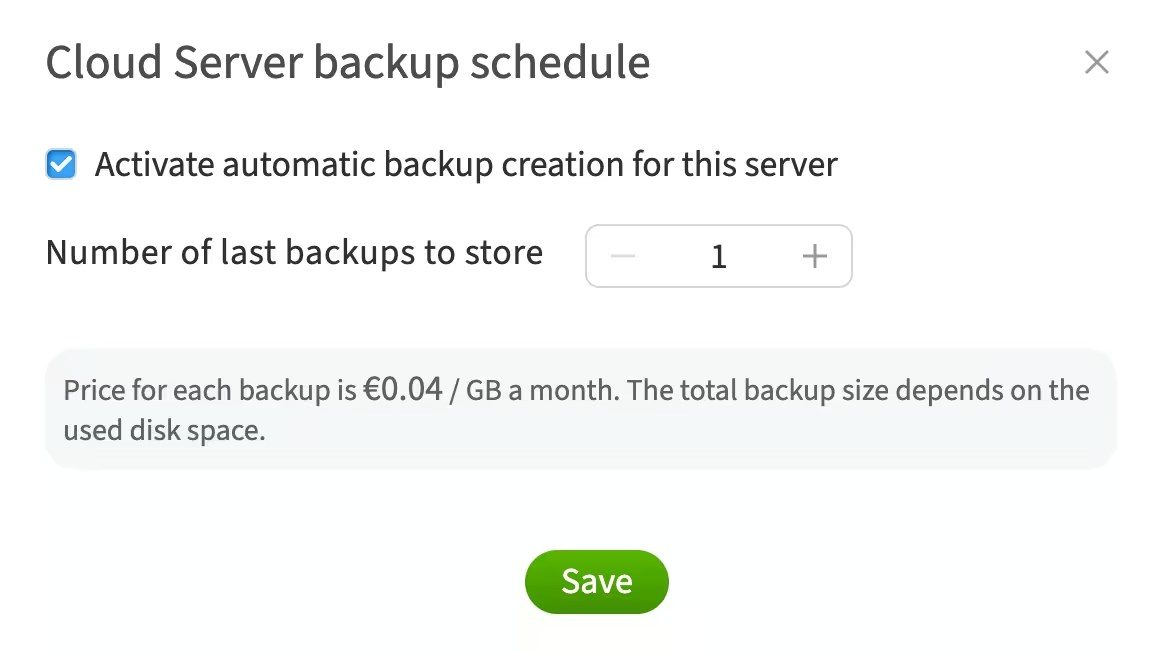
For more details, refer to the backup details.
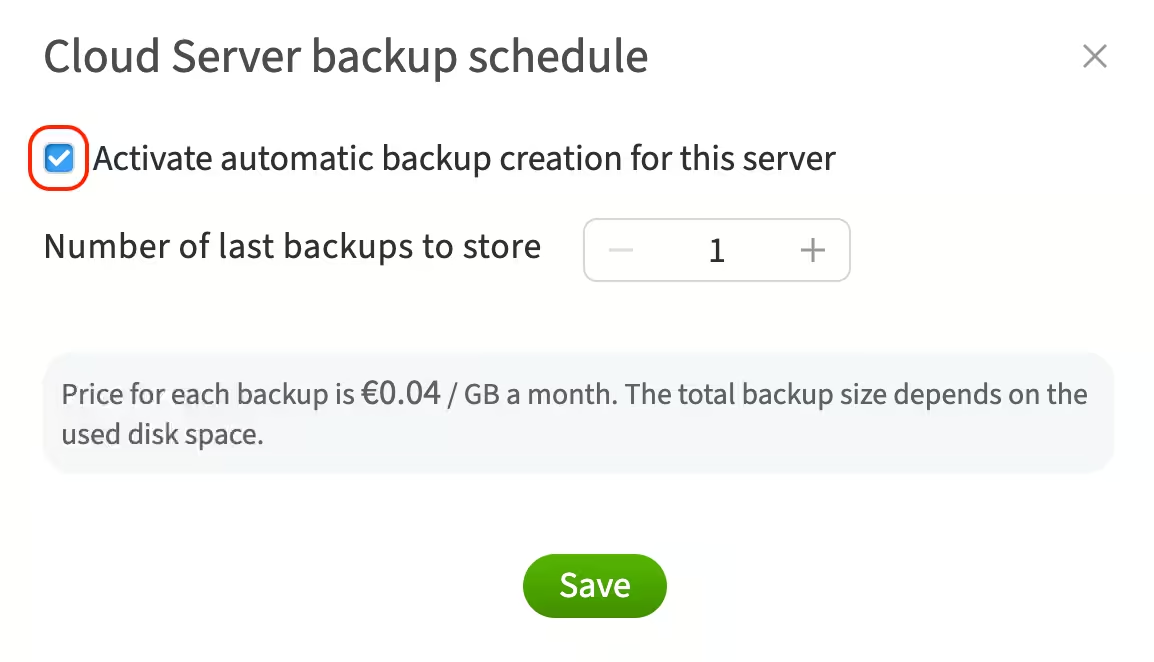
How to disable automatic backup creation
-
In the left-hand menu, navigate to Cloud Servers → Create & Manage and select the server
-
On the server details page, click Backups
-
Click Manage Backups
-
Uncheck the checkbox and click Save
How to restore a cloud server
-
In the left-hand menu, navigate to Cloud Servers → Create & Manage and select the cloud server
-
Decide which image you want to use to restore the server, and navigate to the corresponding tab on the server details page
-
Select the desired snapshot or backup from the list and click Restore
Restoring the server from an image will erase all existing disk data
-
If you are sure, confirm by clicking Reinstall and entering your account password
The server will be restored to the state captured in the selected image.
Volume management
How to create a volume
-
Log in to the customer portal
-
In the left-hand menu, navigate to Cloud Servers → Volumes and select the cloud region
-
Choose a preset volume sizes or choose the Custom Size
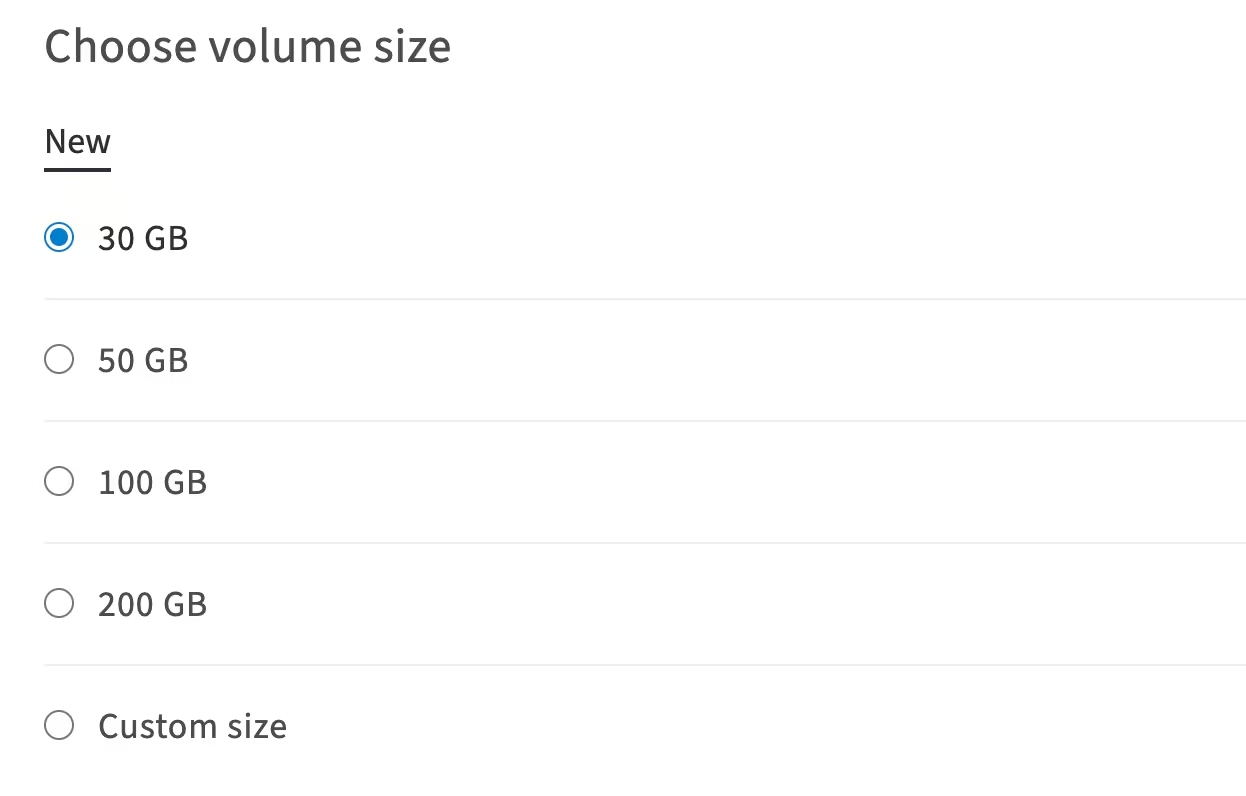
-
Select the cloud server to attach the volume to, or choose Do not attach if you want to attach it later
-
Enter the volume name and click Create Volume
The volume will be created.
For instructions on how to create a volume using the command line, refer to the Mounting a Volume or Cloud Volumes articles.
How to attach a volume to a cloud server
Option 1: attach from the volumes page
-
In the left-hand menu, navigate to Cloud Servers → Volumes
-
Select the created volume and click Attach
-
From the dropdown menu, select the cloud server and click Apply
Option 2: attach from the server details page
-
In the left-hand menu, navigate to Cloud Servers → Create & Manage and select the server
-
On the server details page, click Attach Volume
-
Select the created volume from the list and click Attach
The volume will be attached to the cloud server.
In the Attached to section, you will see the path where the volume is mounted on the server:
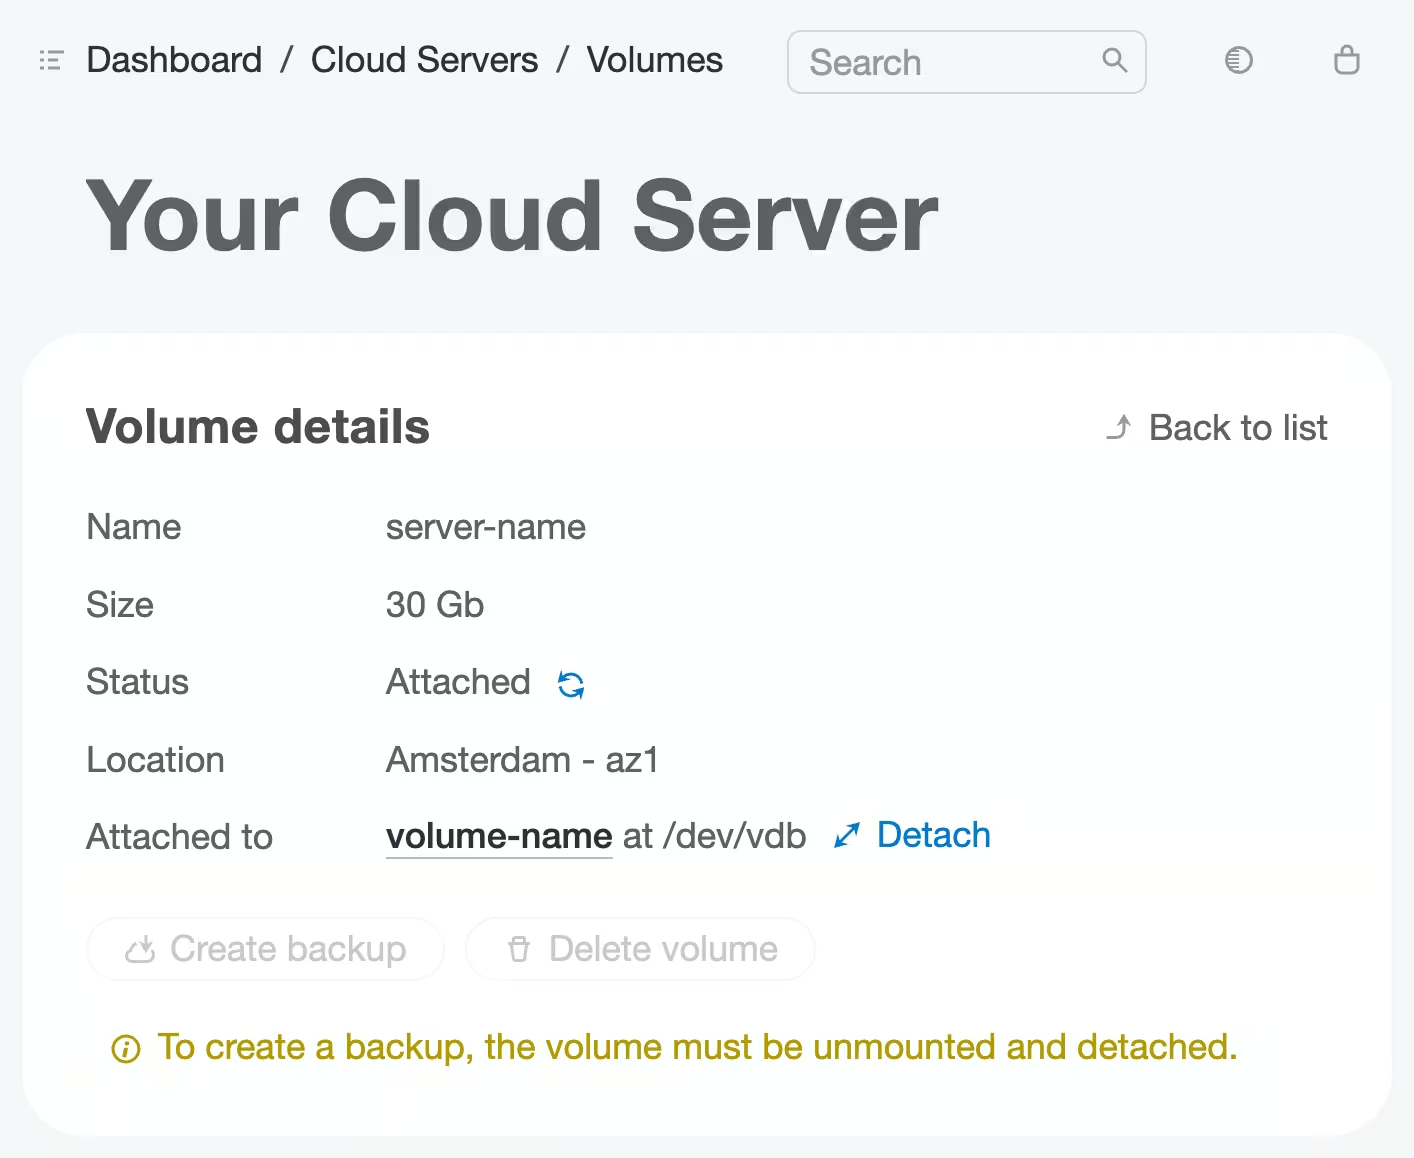
On Linux, the volume is mounted as a block storage device with the device name, e.g., /dev/vdb.
On Windows, the volume will be assigned a drive letter, such as D: or E:.
How to detach a volume from a cloud server
-
In the left-hand menu, navigate to Cloud Servers → Create & Manage and select the cloud server
-
On the server details page, scroll to the Attached Volume row and click Detach next to the volume you want to detach
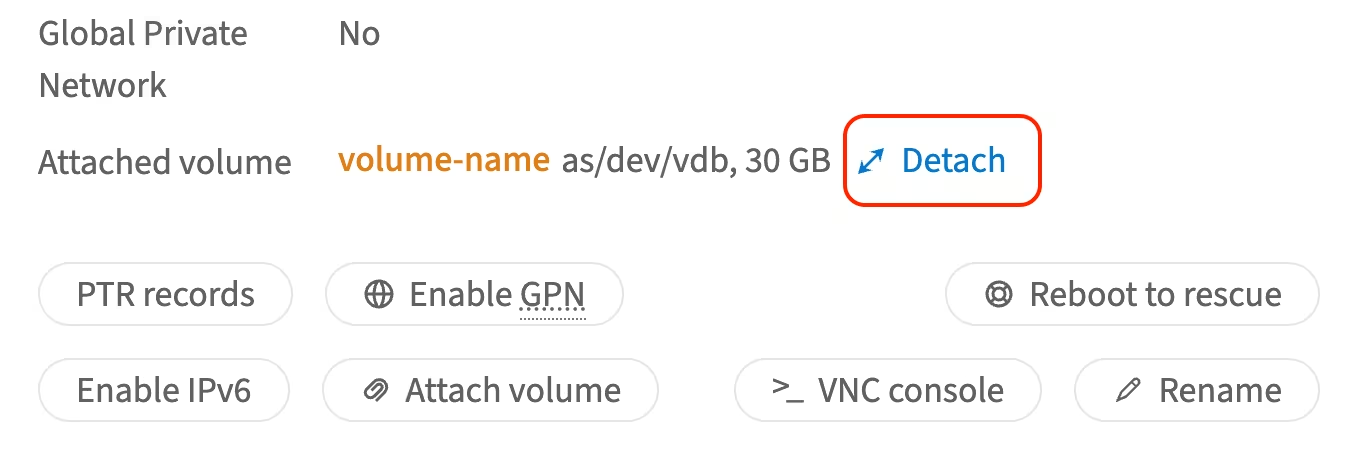
- In the confirmation window, click Detach and confirm the action by entering your account password
The volume will be detached.
OpenStack API
Getting access credentials for OpenStack API in the customer portal
To retrieve your access credentials, navigate to Cloud Storage → Create & Manage and click Show Credentials. In the window that opens, the authorization details will be displayed, based on the selected location.
Installing python-openstackclient
python-openstackclient is a command-line tool for managing OpenStack components, including cloud storage, cloud servers, and more.
It is recommended to install the client from the Ubuntu repository rather than using pip, while pip may provide newer versions with functional differences.
To do this, execute the following command in the cloud server console:
sudo apt-get install python3-openstackclientAuthorization in the OpenStack API using python3-openstackclient
To simplify the authorization process and avoid manually entering credentials each time, create a file with environment variables:
-
Create a
.shfile, by executing the following command:nano ~/%file-name% -
Replace
%file-name%with the name of the created file -
In the customer portal, navigate to Cloud Storage → Access Credentials and click Show next to Shell Variables.
-
The file will open in the nano text editor. Copy and paste the environment variables into the created file in the following format:
export OS_AUTH_URL=https://auth.servers.%location_id%.cloud.servers.com:5000/v3/ export OS_IMAGE_URL=https://images.servers.%location_id%.cloud.servers.com:9292 export OS_TENANT_NAME=XXX export OS_USERNAME=YYY export OS_PASSWORD=ZZZ export OS_IDENTITY_API_VERSION=3 export OS_DEFAULT_DOMAIN_NAME=default -
In the nano editor:
-
Press CTRL + O to save
-
Press Enter to confirm
-
Press CTRL + X to exit the editor
-
-
Import the environment variables into the current terminal session by executing the following command:
source ~/%file-name% -
Replace
%file-name%with the name of the created file.
The environment variables will now be loaded into the current session, allowing the OpenStack client to use them for authorization.
Checking authorization
To ensure the authorization data has been loaded correctly, execute the following command:
openstack token issueIf successful, the command will output a token.
Useful commands
Get a list of available OpenStack commands:
openstack -hGet a list of cloud servers in the location:
openstack server listBrowse available flavors:
openstack flavor listShare
Suggested Articles
- Cloud servers
- Cloud server volumes
- DNS
- Cloud Storage
- Customer Portal
- Dedicated servers
- Firewall
- Forex VPS
- How it works
- Kubernetes clusters
- L2 segments
- Load balancing
- Scalable bare metal
- VPN to GPN