How to create a new SSH key pair
What is an SSH key?
An SSH key is a pair of cryptographic keys used for secure authentication between a local device and a server. This key is based on the SSH (Secure Shell) protocol, which provides encrypted communication for secure remote access, system administration, and data transfer.
It consists of two parts:
-
The private key is stored on the local device from which the user connects to the server
-
The public key is stored on the server and is used to authenticate your connection
Using SSH keys is highly recommended for securing server access, especially when maximum security is required.
How to create a new SSH key using ssh-keygen
Creating an SSH key is a straightforward process. To generate a new SSH key, use the ssh-keygen utility on your local device. This utility is included in the OpenSSH toolkit and is available on macOS, Linux, and Windows operating systems.
How to generate an SSH key on macOS and Linux
Follow these steps to create a new SSH key:
-
Open the Terminal app, which can be accessed via the search menu or the applications list
-
Run the
ssh-keygenutility to generate a new SSH key pair on your local machine:ssh-keygen -
By default, the
rsakey type will be generated. To specify a different key type, use the following command with the corresponding flag and argument:ssh-keygen -t <SSH key type> -
Possible values for
<SSH key type>argument include:ed25519,rsa,ecdsa, ordsa -
Choose a directory to store the keys and name the key. For example, if you select the
rsakey type, you'll see the following prompt:Generating public/private rsa key pair. Enter file in which to save the key (/username/.ssh/id_rsa):-
By default, keys are stored in the
.sshdirectory inside the user's home folder. Press Enter to use the default directory, which allows the SSH client to find keys automatically during authentication -
To use a custom directory, specify the path in the format
/path_to_key/and press Enter
-
-
Set a passphrase for the key (optional)
-
A passphrase encrypts the private key on disk, providing additional security
-
The utility will prompt you to enter a passphrase for additional protection:
Enter passphrase (empty for no passphrase): -
Note that you'll need to enter the passphrase every time you use the key
-
If you don't want to set a passphrase, press Enter twice to skip this step
-
-
Check the generated keys by navigating to the folder where they were saved. For default paths, run:
ls ~/.ssh -
You will find:
-
id_rsa– the private key (stored locally). Do not share it with others or move it to external devices -
id_rsa.pub- the public key (to be added to the server)
-
Your SSH key pair is now ready for use.
How to generate an SSH key on Windows using ssh-keygen or PuTTYgen
Windows users can generate SSH keys using either the built-in OpenSSH client (Windows 10 and later) or the PuTTYgen utility.
Using OpenSSH Client
-
Open the Command Prompt
-
Search for
Command Promptorcmdin the Start menu
-
-
Ensure OpenSSH is installed:
ssh-
If the command is recognized, OpenSSH is already installed
-
If not, install it via Windows settings
-
-
Run the
ssh-keygenutility:ssh-keygen -
By default, the
ed25519key type will be generated. To specify a different key type, use the following command with the corresponding flag and argument:ssh-keygen -t <key_type> -
Possible values for
<key_type>argument include:rsa,ed25519,ecdsa, ordsa -
Choose a directory to store the keys and name the key. For example, if you select the
ed25519key type, you will see the following prompt:Generating public/private ed25519 key pair. Enter file in which to save the key (C:\Users\Your_Username\.ssh\id_ed25519):-
Keys are saved in the
.sshdirectory within the user's home folder by default. Press Enter to use the default directory, enabling the SSH client to find keys automatically during authentication -
To use a custom directory, specify it, e.g.,
D:\My_Keys\id_ed25519, and press Enter -
To accept the default directory, simply press Enter
-
-
Set a passphrase for the key (optional)
-
A passphrase encrypts the private key on disk, providing additional security
-
The utility will prompt you to enter a passphrase for added protection:
Enter passphrase (empty for no passphrase): -
Note that you'll need to enter the passphrase every time you use the key
-
If you don't want to set a passphrase, press Enter twice to skip this step
-
-
Verify the generated keys. After generating your SSH key, navigate to the folder where the keys were saved to verify the private and public keys. For the default path, run:
cd C:\Users\Your_Username\.ssh\ dir -
You will find:
-
id_ed25519— the private key (stored locally). Do not share it with others or move it to external devices -
id_ed25519.pub— the public key (to be added to the server)
-
Your SSH key pair is now created and ready for use.
Using PuTTYgen utility
-
Go to PuTTY website and install utility
-
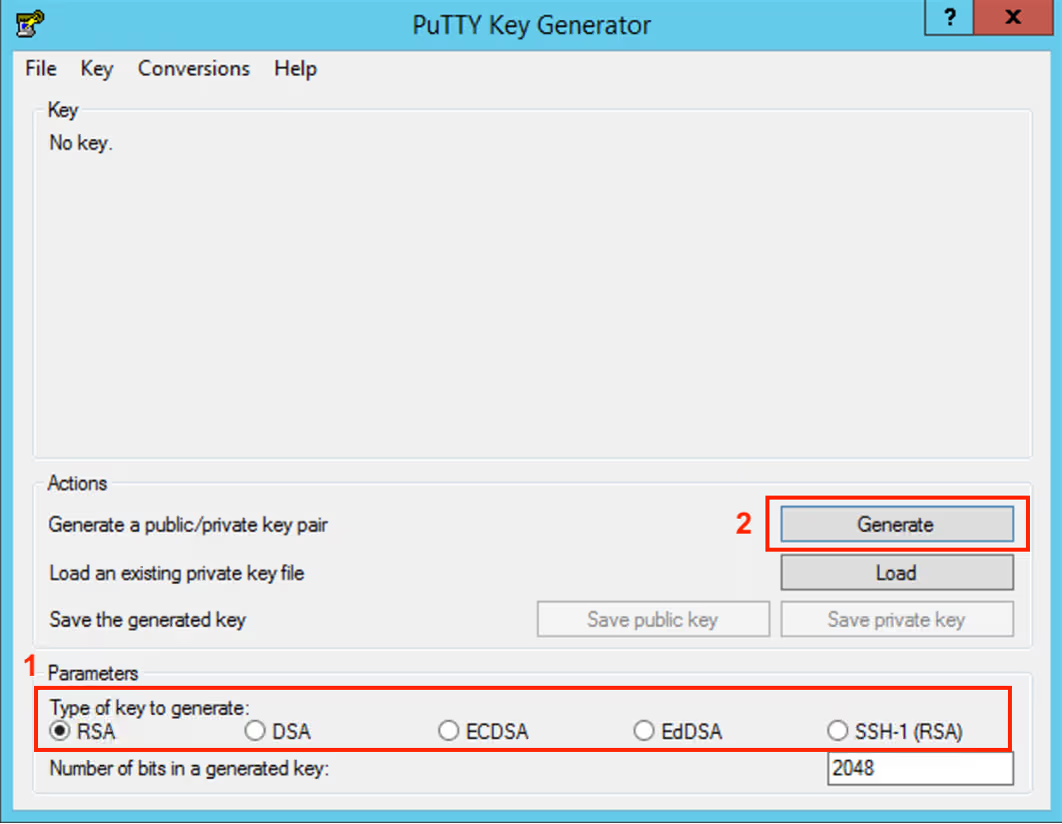
Launch PuTTYgen
-
Select the type of SSH key (e.g.,
rsa)and click the Generate button -
Move the mouse cursor around the screen until the progress bar is completely filled
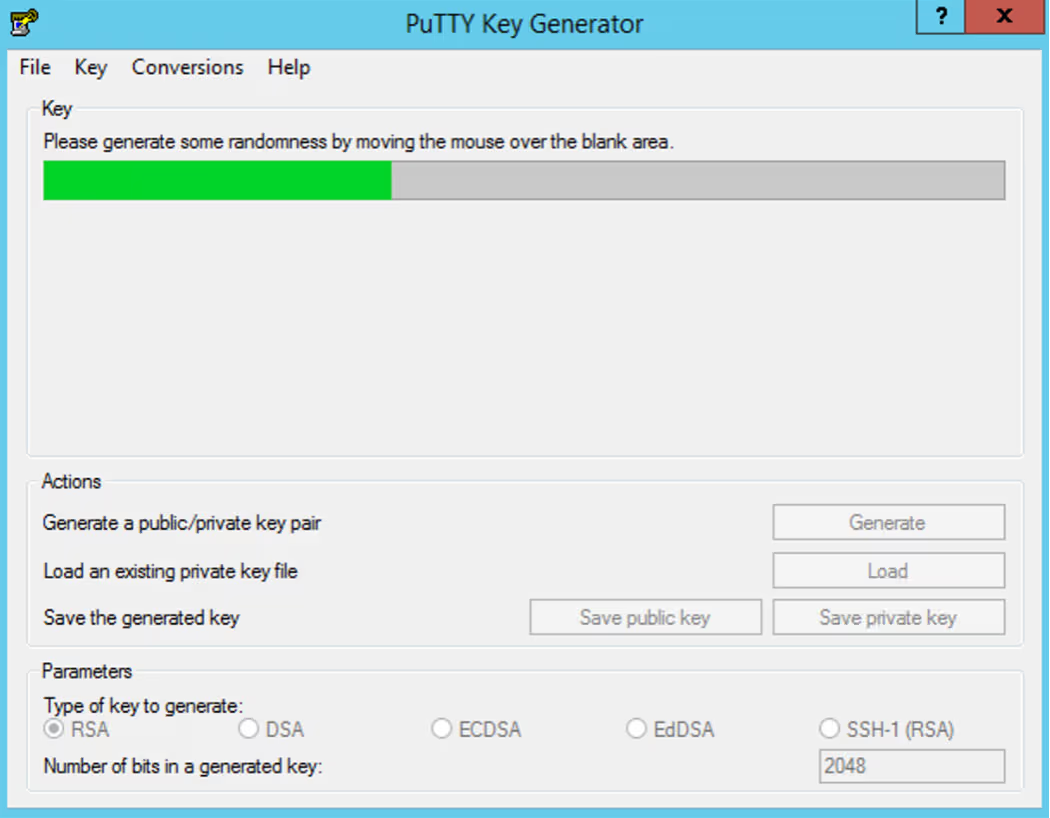
You can move the mouse in any manner, just be careful not to accidentally close PuTTYgen
-
Choose whether to use a passphrase:
-
When the key is ready, enter and confirm the passphrase for the private key in the designated fields
-
If you do not want to set a passphrase, simply save the private and public key files in a secure location. The utility will warn you that the key is being saved without a passphrase
This completes the creation of an SSH key pair.
How to use your generated SSH key
Adding the public key to the server
To use the SSH key pair for authentication, you need to add the public key to the server. To do this:
-
Run the following command:
ssh-copy-id user@server_address -
If
ssh-copy-idis unavailable, display the public key-
Linux, MacOS
cat ~/.ssh/id_rsa.pub -
Windows
type C:\Users\Your_Username\.ssh\id_ed25519.pub
-
-
Copy the output and add it to the
~/.ssh/authorized_keysfile on the server -
Connect to the server:
ssh user@server_address
Upon successful completion of the steps, the server connection will be established.
Share
Suggested Articles
- Cloud servers
- Cloud server volumes
- DNS
- Cloud Storage
- Customer Portal
- Dedicated servers
- Firewall
- Forex VPS
- How it works
- Kubernetes clusters
- L2 segments
- Load balancing
- Scalable bare metal
- VPN to GPN